Installing a ceiling light can transform a dim room in an afternoon. However, the work requires more than connecting wires and tightening screws. How to Install Ceiling Lighting safely depends on the existing ceiling box, circuit condition, fixture weight, and local electrical requirements.
This guide presents seven practical tips based on common residential installation steps. You will learn how to switch off power, inspect the mounting bracket, identify wire connections, and secure the fixture against the ceiling. A voltage tester is essential. So is patience. Never trust a wall switch alone, because the ceiling wires may still carry power.
Before touching anything, turn off the correct breaker and test every wire. If the wiring looks damaged, confusing, or unusually old, stop and contact a licensed electrician. That choice may feel inconvenient, but it prevents expensive mistakes and serious injury. A light fixture can appear simple. It is not always simple.
You will also see how to choose suitable bulbs, balance the fixture, and check for loose connections after installation. Small details matter, such as supporting a heavy pendant while attaching wires. I have found that rushing this moment often creates crooked fixtures or strained cables. Even careful planning can miss an unexpected ceiling box problem. Recheck your assumptions, follow the manufacturer’s instructions, and confirm local rules before restoring power.
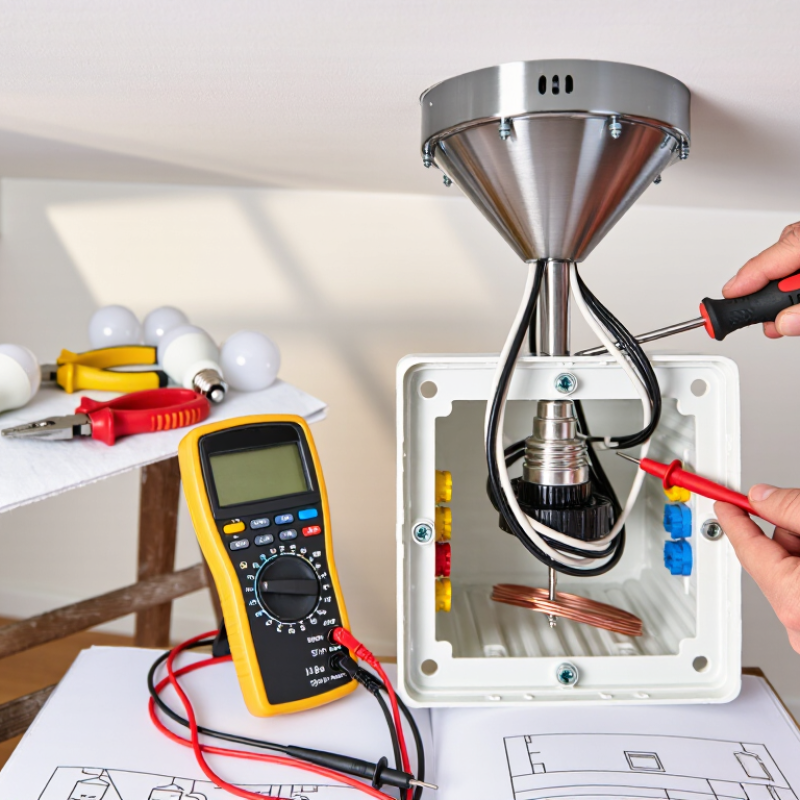
Assess the ceiling before opening any wire connector. Locate a joist, inspect the existing electrical box, and confirm its weight rating. A decorative fixture can pull loose from weak plaster or unsupported drywall. Tap the surface gently and look for cracks, stains, or previous repair marks. Stop there. Moisture damage needs attention before installation. NFPA’s Home Structure Fires research identifies electrical distribution and lighting equipment as a leading contributor to residential fire losses.
Switch off the circuit breaker, then verify the wires with a voltage tester. Do not rely on the wall switch alone. Check whether the wiring includes a grounding conductor, and photograph the connections before removing anything. Brittle insulation, loose copper, aluminum conductors, or confusing color patterns require a qualified electrician. The U.S. Energy Information Administration reports that residential lighting remains a significant household electricity use, so sound connections matter beyond appearance. My early checklist would have been better with a second tester check. Measure twice.
Choose tools that fit the task: insulated screwdrivers, wire strippers, a tester, mounting screws, and eye protection. Follow the fixture’s load and installation instructions, while keeping wires folded without sharp bends. The U.S. Department of Energy states that LED lighting uses at least 75% less energy and lasts up to 25 times longer than incandescent lighting. That efficiency is useful, but it cannot correct unsafe wiring. After mounting, restore power and test the switch, flicker, heat, and unusual noise. If anything feels uncertain, pause and obtain an electrical inspection.
Before touching the ceiling fixture, switch off power at the circuit breaker. Do not rely on the wall switch alone. A ceiling box can still contain energized wires.
Use a voltage tester on every wire, including the ground wire. Test the device on a known live outlet before and after checking the fixture. This confirms that the tester works properly. Wait.
I once rushed this step and found a second cable tucked behind the mounting plate. That small surprise changed my routine. Now I label each wire, take a clear photo, and loosen the wire connectors carefully. Never pull hard on old insulation, because it may crack.
Tips: Place a small container nearby for screws. Support the fixture with one hand while removing the final screw. Heavy fixtures may require two people. Check the ceiling box for loose screws, heat marks, or damaged wiring. Stop if anything looks burned, brittle, or confusing. A qualified electrician should inspect uncertain wiring before installation.
Keep wire ends separated while testing. Bare copper should not touch another conductor. If the fixture has a grounding wire, connect it only as instructed by the installation guide and local electrical requirements. Ceiling work feels simple, but hidden damage is easy to miss.
How to Install Ceiling Lighting: 7 Easy Tips
Installing the mounting bracket is a small step with serious consequences. Turn off the circuit breaker, then verify the wires with a voltage tester. Do not trust the wall switch alone. The Electrical Safety Foundation International reports about 51,000 home electrical fires annually, causing nearly 500 deaths and over 1,400 injuries. That figure makes careful preparation practical, not excessive. Check that the ceiling junction box is rated for the fixture’s weight. Secure the bracket with the supplied screws, or use approved fasteners suited to the box. The bracket should not move when gently pulled.
Prepare the electrical connections before lifting the light. Keep the ground wire continuous and connect it to the grounding screw or approved grounding point. Match the supply conductors according to local electrical codes and the fixture instructions. Wire color helps, but it is not proof of correct identification. Older homes may contain faded insulation or unexpected wiring. Pause and test again. A mistake worth admitting: a bracket can look secure while one screw barely catches the box. I would rather reposition it than repair a falling fixture. NFPA 70, the National Electrical Code, provides widely used installation requirements, but local rules may differ. If the box is damaged, overloaded, or missing, stop and contact a licensed electrician. Safety depends on the connection, not just the appearance.
Use this planning chart to organize the main stages of a ceiling-light installation. The time estimates are typical for a straightforward replacement where an existing electrical box and wiring are already available.
Safety reminder: Turn off the circuit breaker, verify that the wires are de-energized with a properly rated tester, and follow local electrical codes. If the electrical box is damaged, unsupported, or the wiring is unfamiliar, contact a qualified electrician.
Turn off the circuit breaker before touching any ceiling wires. Do not trust the wall switch alone. Confirm the circuit is dead with a properly rated voltage tester. If the tester gives an uncertain reading, stop and contact a licensed electrician.
Remove the old fixture carefully, supporting its weight with one hand. Inspect the ceiling junction box for cracks, loose screws, or movement. The box must support the new fixture and its listed weight. Connect matching conductors according to the fixture instructions. Typically, the live wire connects to live, neutral to neutral, and ground to ground. Wire colors can vary in older homes. Check local electrical rules before making assumptions. Fold the connections neatly into the box. Avoid forcing sharp bends.
Tips: Use approved wire connectors, not twisted tape alone. Keep copper fully inside each connector. Attach the grounding wire securely. I once left a small loop outside the box, and it made the cover sit unevenly. That mistake was easy to miss. Recheck every connection. Mount the bracket firmly, then lift the fixture into place. Use the supplied screws and tighten them evenly. Never support a fixture with drywall alone. The fixture should sit flat, without wobbling. Restore power only after the canopy is secure, then test the light and switch.
After installing ceiling lighting, restore power and test the light from every intended switch. Watch for flickering, delayed startup, buzzing, or a burning smell. These signs can indicate a loose connection, incompatible control, or excessive heat. The U.S. Department of Energy reports that LED lamps use at least 75% less energy and last up to 25 times longer than incandescent lamps. That efficiency still depends on correct installation and ventilation.
Check stability while the light is switched on. Stand beneath it and look for shaking, tilting, or movement around the canopy. Gently test the fixture by hand only after turning power off at the breaker. Tighten mounting hardware according to the installation instructions, but do not force screws into the ceiling box. The National Fire Protection Association identifies electrical distribution and lighting equipment as recurring factors in home fires, so a loose fitting deserves attention. I used to treat a quiet fixture as finished. That was too optimistic. Heat and movement may appear later.
Inspect the final finish closely. The canopy should sit flat, with no visible gaps or pinched wires. The shade should be level, clean, and free from cracks. Leave the light on for 15 to 20 minutes, then check for unusual heat or odor without touching hot surfaces. If the box flexes, wiring looks damaged, or the fixture remains unstable, stop testing and contact a qualified electrician.
| Step | Installation Tip | Recommended Action | Tools or Materials | Check Before Moving On | Typical Time |
|---|---|---|---|---|---|
| 1 | Turn off the power | Switch off the correct circuit breaker before removing the existing fixture. Keep the wall switch off as an additional precaution. | Electrical panel label, non-contact voltage tester, insulated screwdriver | The voltage tester shows no electrical activity at the ceiling wires. | 5–10 minutes |
| 2 | Inspect the ceiling box | Check that the electrical box is firmly attached to the framing or an approved support system and is suitable for the fixture's weight. | Flashlight, screwdriver, mounting hardware, approved support brace if required | The box does not move when gently tested, and the mounting screws fit securely. | 10–20 minutes |
| 3 | Prepare the wires | Separate the supply wires and identify the live, neutral, and grounding conductors according to local wiring practice. Inspect insulation for cracks or damage. | Wire stripper, wire connectors, electrical tape, wire labels | Conductors are clean, undamaged, and long enough to make secure connections without strain. | 10–15 minutes |
| 4 | Attach the mounting bracket | Fasten the fixture bracket to the ceiling box using the supplied screws or correctly sized box screws. Align the bracket before tightening. | Phillips or flat-head screwdriver, level, approved screws | The bracket sits flush, is level, and does not shift when lightly pressed. | 10–15 minutes |
| 5 | Connect the fixture wiring | Connect matching conductors with approved wire connectors, attach the grounding conductor, and carefully place the connections inside the box without pinching them. | Approved wire connectors, screwdriver, wire nuts or push-in connectors | Each connector is tight, no bare copper extends beyond the connector, and the ground connection is secure. | 10–20 minutes |
| 6 | Secure the light and check stability | Attach the fixture body or canopy to the bracket. Tighten all retaining screws evenly, then gently check for wobbling, tilting, or gaps. | Hand screwdriver, level, step ladder, soft cloth | The fixture is level, firmly supported, and remains stable during a gentle hand check. | 10–15 minutes |
| 7 | Test the light and finish the installation | Restore power and operate the switch. Check brightness, flickering, unusual noise, heat, and switch response. Turn power off again before making any adjustment, then clean fingerprints and confirm that the canopy and trim are evenly seated. | Light bulbs or compatible lamps, dry microfiber cloth, ladder | The light turns on normally, shows no flicker or unusual heat, and all visible parts are clean, aligned, and gap-free. | 10–15 minutes |
Check the ceiling surface, supporting joist, and electrical box. Look for cracks, stains, loose plaster, or repair marks. Stop if moisture damage appears. A weak ceiling may not support a decorative fixture.
No. Switch off the circuit breaker and verify the wires with a voltage tester. Check them twice. Photograph the connections before removing them.
Ask for professional help when wires have brittle insulation, loose copper, aluminum conductors, or confusing colors. Damaged wiring should not become a guessing exercise.
Prepare insulated screwdrivers, wire strippers, a voltage tester, mounting screws, and eye protection. Use tools suited to the fixture. Measure twice.
Keep wires folded gently without sharp bends. Confirm the grounding conductor and follow the fixture instructions. Unsafe wiring cannot be corrected by an efficient light.
Restore power and watch for shaking, tilting, or canopy movement. Turn power off before touching the fixture. Tighten hardware as instructed, but do not force screws into the ceiling box.
Look for flickering, delayed startup, buzzing, burning smells, unusual heat, or repeated noise. These signs may indicate loose connections, incompatible controls, or excess heat. Stop if anything feels wrong.
The canopy should sit flat without gaps or pinched wires. The shade should be level, clean, and crack-free. Leave it on for 15 to 20 minutes. Check nearby surfaces for unusual heat without touching hot parts.
Do not assume the work is finished. Heat and movement may appear later. My earlier checklist trusted silence too much. A second inspection would have been wiser.
How to Install Ceiling Lighting begins with careful preparation. First, inspect the ceiling, electrical box, wiring, and available support to confirm that the location can safely hold the fixture. Gather the necessary tools, read the fixture instructions, and wear suitable safety equipment. Before touching any wires, switch off power at the circuit breaker and verify that the electricity is off. Remove the existing ceiling fixture carefully, keeping track of the wiring and hardware.
Next, attach the mounting bracket securely and organize the electrical connections. Match the ceiling wires with the fixture wires according to their functions, secure the connections properly, and gently place the wires inside the electrical box. Fasten the light fixture to the bracket so it sits firmly and evenly. Restore power only after everything is secured, then test the light and check for flickering, unusual sounds, loose parts, or uneven positioning. Finish by tightening hardware, cleaning the fixture, and contacting a qualified electrician if the wiring or support structure is unclear.

Cool Light